How To Plan A Useful Home Office Screen Setup With Fewer Cables And Distractions
A practical step-by-step guide to how to plan a useful home office screen setup with fewer cables and distractions, including preparation, instructions, common issues, tips, and next steps.
How To Plan A Useful Home Office Screen Setup With Fewer Cables And Distractions
Planning a home office screen setup with fewer cables and distractions means thinking about the physical arrangement, the technology choices, and the habits that keep your attention focused. A good setup reduces clutter, supports your posture, and minimizes the number of times you need to plug or unplug devices. By choosing the right peripherals, using wireless or consolidated connections, and organizing your desk with simple tools, you can create a workspace that feels calm and works well. This guide walks you through the process step by step, from assessing your needs to fine-tuning your final arrangement, so you end up with a setup that is both practical and pleasant to use every day.
Fast Answer
- Start by deciding which devices you actually need at your desk, then consolidate connections: use a single docking station or a monitor with built-in ports to reduce the number of cables you have to manage.
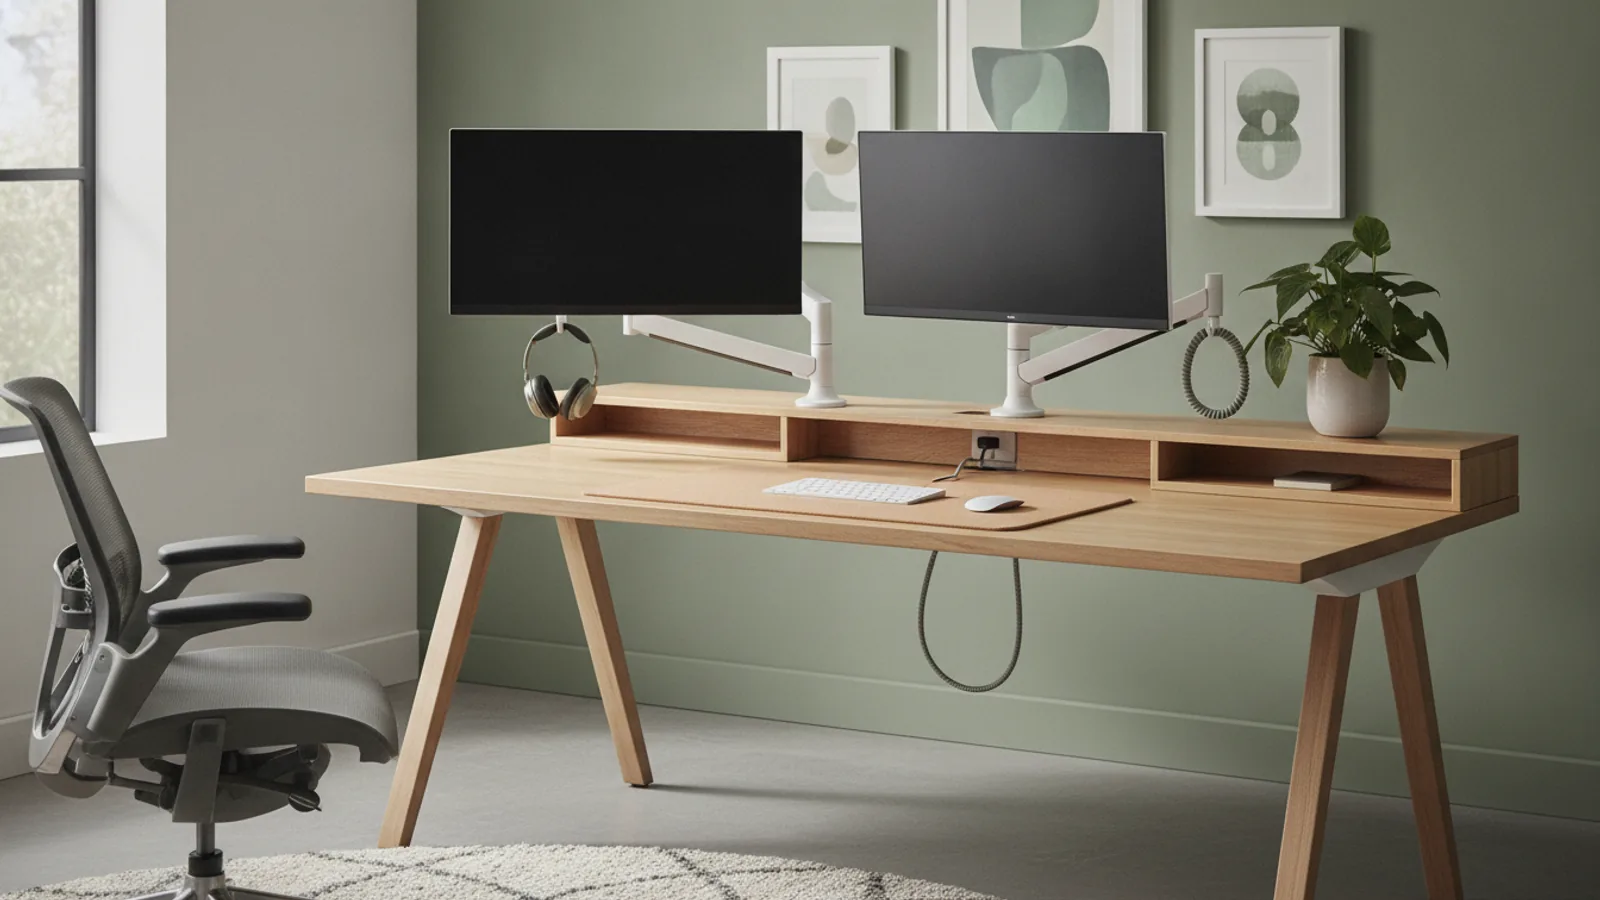
- Use cable management tools like adhesive clips and sleeves to route every remaining cable neatly, and position your monitor(s) so that the top of the screen is at eye level to reduce neck strain.
Before You Start
- Measure the depth and width of your desk and note the location of power outlets and existing cable holes or trays, so you can plan where to route cables without stretching or crossing them.
- List every device you plan to connect to the monitors (like a laptop, desktop, tablet, or phone) and determine which ports each one uses, since this decides what kind of hub or adapter you might need.
- Decide whether you want a single large monitor or two smaller ones, based on the type of work you do, and consider a monitor arm or stand to free up desk space and make height adjustments easy.
- Buy or gather cable management supplies such as adhesive hooks, zip ties, Velcro straps, and a cable sleeve or box, plus a label maker or tags to identify each cable for future changes.
Step-by-Step Instructions
Assess Your Workspace and Devices
Begin by clearing off your desk completely and taking a careful inventory of every device you need at your workspace. Look at the back of your monitor or laptop to note what ports are available and which cables are already attached. Place a notepad on your desk to draw a simple map of your desk surface, marking where the power outlets, your chair, and the window or doorway are. This map helps you decide which side of the desk should hold the monitor(s) and where you want the cable run to go. Unplug everything and lay out all the cables and adapters you own, labeling each with a piece of tape that says which device it belongs to. (A specific action: write down the exact port types and cable lengths for each device.)
Choose Wireless or Consolidated Connectivity
Now that you see your full list of devices, decide which connections you can switch from wired to wireless. For example, you might replace a mouse and keyboard with a single Bluetooth set to eliminate two cables. For the remaining wired connections, think about using a single hub or a monitor that acts as a docking station. Many monitors have a USB upstream port that connects to your computer, and then you can plug your keyboard, mouse, and other USB accessories directly into the monitor's side or back ports. This way, you only have one cable from your computer to the hub, and then a short cable from the hub to your monitor. If you have a laptop, you may only need one cable for both power and display, provided your monitor supports this through USB-C Power Delivery.
Map the Cable Route
Use your desk map to plan the exact path each remaining cable will take. The goal is to have cables run along the edges of the desk or directly behind the monitor, never across the surface where you place your hands. Identify where each cable enters the desk surface, whether through a grommet, a gap in the back, or along the underside. If you have a monitor arm, plan to thread the display cable through the arm's channel if possible, because that hides it completely. For power cords, find the shortest route from the outlet to the device, and if you need an extension cord, place the power strip underneath the desk and secure it so it is out of foot space. Draw arrows on your map to show the direction each cable will go, and mark where you will attach clips.
Arrange the Monitors and Desk Equipment
Place your monitor(s) directly in front of you, with the top edge of the screen at or slightly below eye level. If you use two monitors, angle them slightly so that you are positioned at the meeting point, and keep the secondary monitor at the same height or a bit lower. Set up the keyboard on the desk directly in front of the monitor, leaving enough space for the mouse beside it. Place any peripherals like a microphone or external webcam on a separate surface if possible, so they do not crowd the mouse area. Think about sources of glare: angle the screen perpendicular to any window, not facing it, and consider a matte screen protector if you see reflections.
Implement Cable Management
Now that everything is positioned, you can start bundling and hiding the cables. Use adhesive clips along the desk edge and run the cables as a single bundle, using a sleeve or spiral wrap to group them. For cables that must go from the desk to the floor, use a strap to keep them tight against a desk leg, leaving some slack at the top so you can move the desk without stressing the connectors. Bundle cables together using Velcro ties, but do not pull them too tight—leaving a little slack prevents strain. Use a cable box or a simple tray under the desk to hold the power strip and any excess length. Finally, label both ends of each cable with a small tag or colored tape so that later you can identify which cable goes where without following the entire path.
Test Ergonomics and Adjust
Sit in your chair with your feet flat on the floor and your elbows at a 90-degree angle. Check that your wrists are straight when you type and that your monitor is at eye level. If you need to adjust the height, use the monitor’s built‑in adjustments or add a riser. Move the keyboard and mouse closer to you if you find yourself reaching forward, and adjust the screen distance so that you can read text without leaning forward. Finally, walk around the room to see if any cables are stretched or looped in places that could catch your feet. Make any final adjustments to cable clips to keep them secure.
Quick Reference
| Situation | Action | Why it helps |
|---|---|---|
| You have a laptop, a monitor, and a wireless mouse and keyboard, but you still need to plug in a webcam and an external drive. | Connect the webcam and drive to a small USB hub that attaches to the monitor's USB ports, then plug the monitor's upstream cable into your laptop so you only have one cable from the laptop to the monitor. | This reduces the number of cables from the laptop to just one, while still allowing you to use multiple devices; it also keeps the webcam and drive accessible from the side of the monitor. |
| Your desk has a cable grommet, but the monitor power cable is too short to reach the power strip underneath. | Use a heavy-duty extension cord from the wall outlet to a power strip that sits directly under the grommet, then plug the monitor and other devices into that strip. | Bringing power close to the grommet shortens the visible cable run and lets you hide the excess length beneath the desk, keeping the surface clutter-free. |
| You notice the monitor cable is thick and rigid, making it hard to route behind the monitor arm. | Use a flexible HDMI cable or a display cable with a right-angle connector on one end, and attach the cable to the arm with small zip ties or adhesive hooks. | Rigid cables are difficult to bend and can create stress at the ports, so a flexible cable or an angled connector makes the routing easier and reduces the risk of damage. |
Common Issues
- Cables keep falling off the desk clips or sliding down the desk leg.: Use stronger adhesive clips with a larger grip, and wrap the cable bundle with cable wrap before attaching it to the clip. For the leg, use a leg‑mount cable tie or a flexible hook-and-loop strap that you can tighten.
- The monitor screen reflects the window or overhead light, causing glare.: Reposition your desk so the monitor is perpendicular to the window, close blinds during daylight, or attach a glare‑reducing screen filter. You can also adjust the brightness and contrast to minimize reflection.
- One of the devices won't turn on after rearranging the cables, even though the connections seem correct.: First, check that the power cable is firmly plugged into both the device and the strip. Then, try a different port on the hub and restart the device. If it still fails, swap the cable with a known‑working one to see if the issue is the cable or the port.
Advanced Tips
- Invest in a cable‑free charging pad on your desk for your phone and earbuds; that eliminates at least two cables and reduces the temptation to pick up your phone if you keep it face down.
- If you often move your laptop in and out of the desk, install a quick‑release dock that lets you connect the laptop with a single motion, and keep the power adapter attached to the dock to avoid unplugging it each time.
- Consider a monitor with built‑in KVM (keyboard, video, mouse) switching if you use two computers, so you can press a button to control both machines with the same keyboard and mouse, reducing extra cables and switching hassle.
Final Checklist
- I have measured my desk and know the exact locations of power outlets and cable holes.
- I have chosen a single hub or dock and verified that it matches the ports on my computer and monitor.
- I have planned the cable route so that no cable crosses the desk surface where my hands rest.
- I have adjusted the monitor height and angle so that the top of the screen is at eye level and there is no glare.
FAQ
Is it better to use two monitors or one ultrawide monitor to reduce cable clutter?
It depends on your work style. A single ultrawide monitor uses only one cable connection, but you may find it harder to arrange windows side by side. Two monitors give you clear separation but require either two cables or daisy‑chaining, which adds a second cable. If you want the least amount of cables, choose a single wide monitor that can split the screen into virtual workspaces.
What is the best way to hide cables if I do not want to drill holes in my desk?
Use a cable raceway, which is a self‑adhesive plastic channel that mounts on the edge or underside of the desk. You can run cables through it and cover them with a flip‑up lid. Alternatively, use vertical clips that stick to the desk leg and follow the existing contours, or use a cable sleeve that is designed to be attached with Velcro.
How can I reduce eye strain and distractions from multiple monitors?
Set both monitors to the same brightness and color temperature, and arrange them so that the main monitor is directly in front of you and the secondary is at a slight angle. Use only the screens you need and close browser tabs or apps that are not in use. You can also use a software tool to automate your workspace layouts, but even a simple habit of closing unused windows helps.